
Imagine being able to show the status of your Jenkins projects to anyone in the same room without the hassle of logging in to the dashboard. With some LEDs, a few other cheap components, and some soldering skills, you can complete this project. You can take it to the next level, however, by using an industrial tower light instead of regular LEDs. Employing an existing API, you can retrieve almost any data from Jenkins and get a nice visual indicator of the status of your project.
You'll need
IRLB8721 MOSFETs
220-ohm resistors
12V power supply and jack
12V to USB converter
Micro-USB to Ethernet adaptor
Miscellaneous other parts
STEP-01 Make a HAT
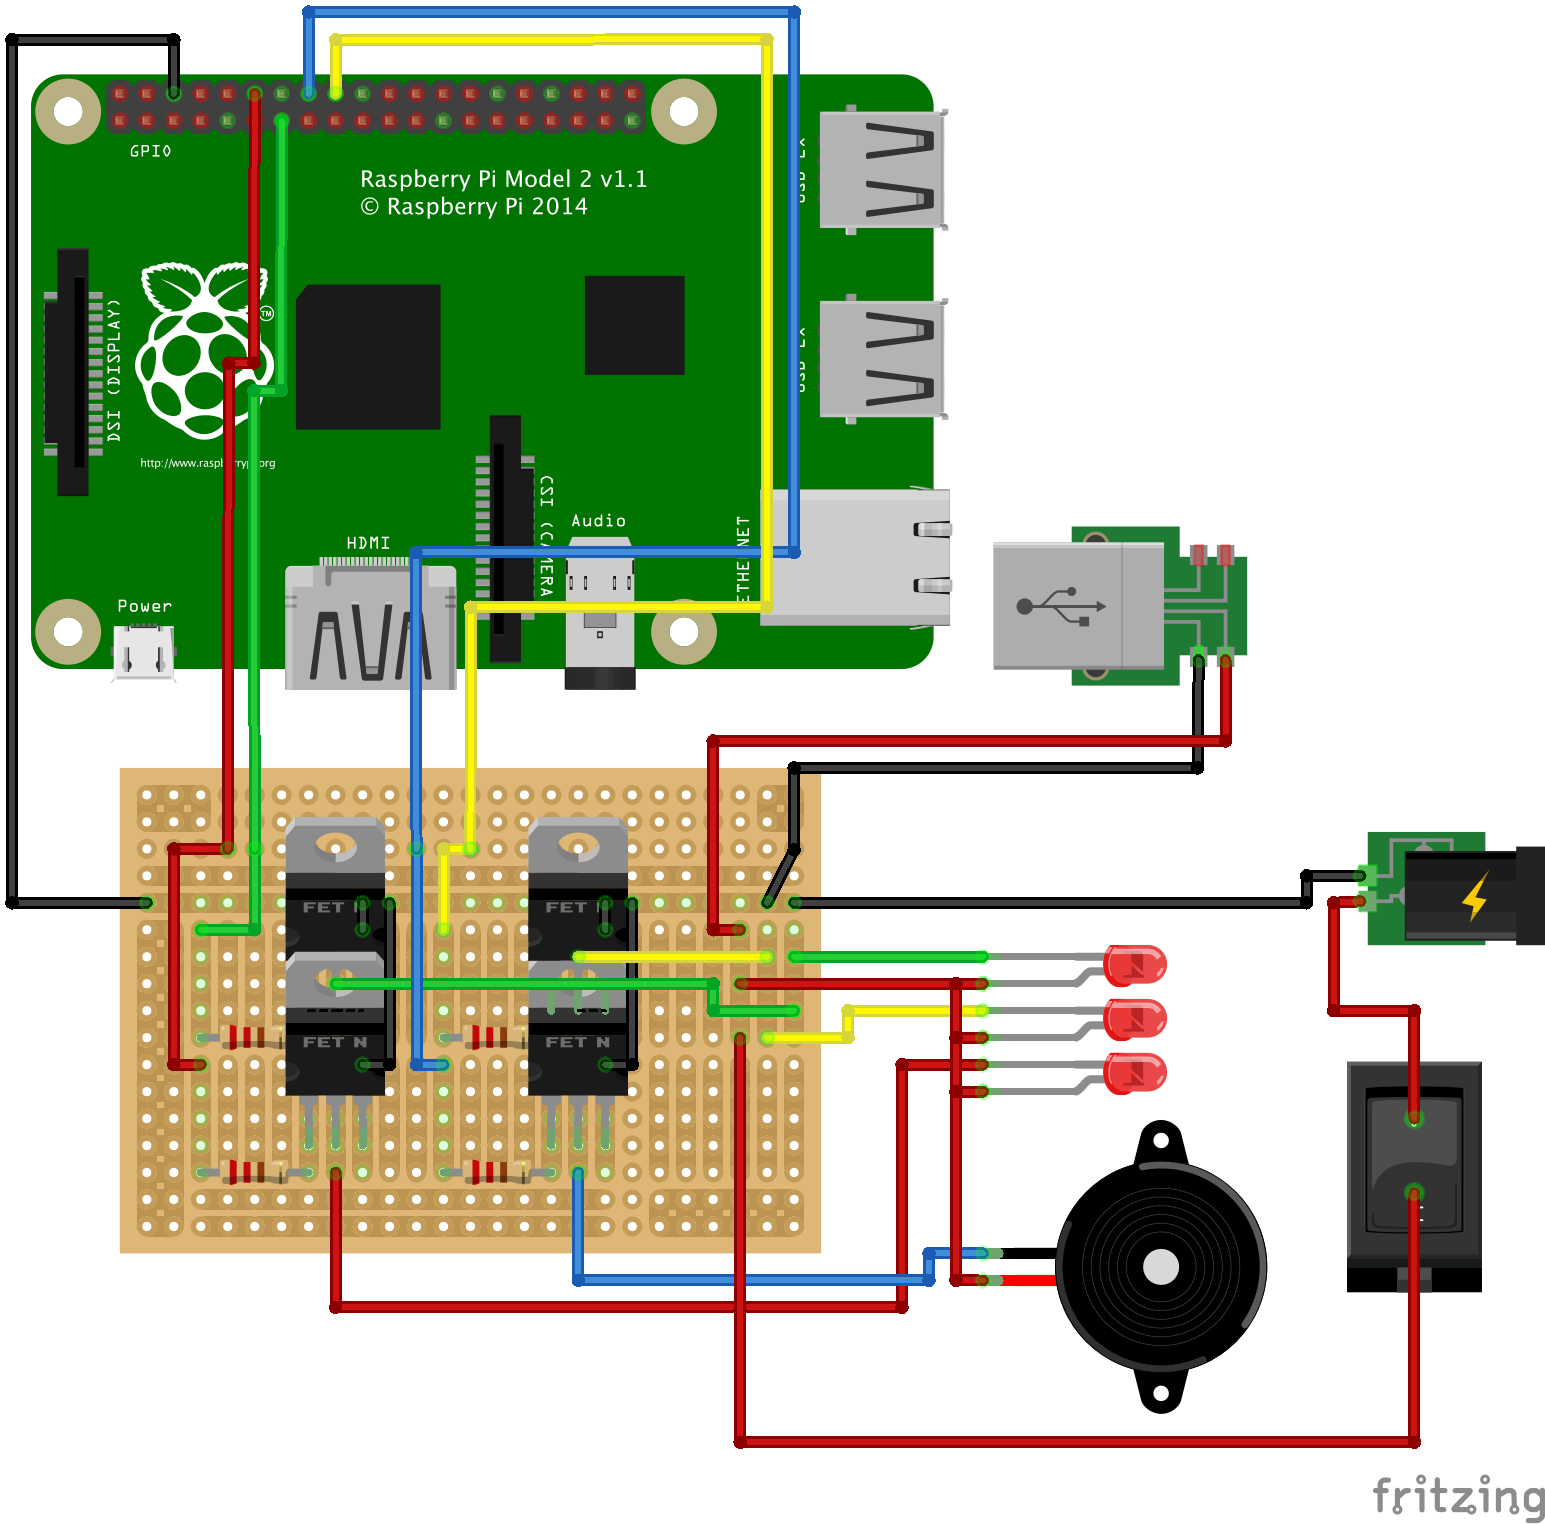
First, we need to create the HAT. We used a Perma-Proto board from Adafruit, but you can also use a breadboard if you don’t want a permanent solution. In this version, the following GPIO pins were used, since they best fit the layout:
Pin 18: Red
Pin 23: Buzzer
Pin 24: Yellow
Pin 27: Green
You can use the GPIO output voltage in combination with a MOSFET and a resistor to switch 12V safely to the LEDs. There’s also a 12V to USB converter to power the Raspberry Pi from the barrel jack, and a small power switch.
STEP-02 The Python Jenkins-API
You need to start off with a clean Raspbian Jessie image (not the Lite version) and a Raspberry Pi Zero (make sure to solder the GPIO header pins!). After you have burned the image and completed the basic setup, make sure to set up an internet connection. You can either use a standard WiFi dongle or a micro‑USB to Ethernet adaptor. Once you are ready, proceed with the installation of the Jenkins API. In the terminal window, enter the following command:
sudo apt-get install python-jenkinsapi
STEP-03 Create the Python script
Most of the coding work has already been done for you and is available on GitHub. To get everything you need for this project, clone the project from GitHub on your Raspberry Pi by using the following command in your terminal:
git clone https://github.com/BramDriesen/rpi-jenkins-tower-light.git
Make sure to clone the project in a directory where you can easily find it afterwards, such as the home directory. You can use cd [folder]/[name] and cd ../ commands to navigate through folders in your terminal. You can also download a ZIP file of the source code from the versions page.
STEP-04 Configure the code
Now we have cloned the project, we’ll browse into the directory to configure the Python script. Copy the default configuration file default-config.py and rename it to config.py. You can use the command cp default-config.py config.py to do this all in one go. After you have copied the file, edit it with your favorite text editor; we like to use nano, so in this case we’d issue the command nano settings.py. Now change the default configuration lines so it contains your credentials, job name(s), and correct GPIO pins according to your situation. If you have only one job, make sure the jobs parameter remains an array with one item inside.
STEP-05 Auto-run on boot
Since we’re working on a permanent solution, we want to ensure that our script launches immediately on boot. We can edit our rc.local file to launch the script when the Raspberry Pi is booted up. Edit your rc.local file with sudo nano/etc/rc.local and add the following line to direct the script to auto-start upon boot:
python /path/to/the/script/rpi-jenkins-tower-light/jenkinslight.py &
Reboot your Pi and you should be good to go! For maintenance, you can always SSH into the Raspberry Pi in the future.
Code listing
# Default configuration file for Jenkins
# Copy this file and name it config.py
jenkinsurl = "http://example-url.com:8080"
username = "your-username"
password = "your-password"
jobs = ['job-name-1', 'job-name-2']
gpios = {
    'red': 18,
    'buzzer': 23,
    'yellow': 24,
    'green': 27,
}


