
ClusterHAT is an ingenious solution to the problem of building a cluster computing. Learning distributed computing is something of a challenge, and this small hardware kit is the answer.
Our ClusterHAT review looks at how to build a cluster computer using a Raspberry Pi and four Pi Zero boards.
This article is by Lucy Hattersley and appears in The MagPi - The Official Raspberry Pi magazine issue 55. Click here to download your free copy.
Building a computer cluster is one of the most impressive Raspberry Pi projects. And being able to program cluster computers is one of the most highly valued skills in the world of big data.
A cluster is a set of computers networked together and used as a single system. Each computer (or ‘node’) is scheduled to work on the same task, controlled by a master computer.
Knowing how to manage, and use, clustered computers and supercomputers is a pretty valuable skill. It’s also one of the areas at the absolute forefront of computing technology.
But it has always been difficult to get started. Traditionally, cluster computing has been an expensive hobby. You need lots of computers (preferably identical) and a network controller and the skill to network them all together. This difficulty is before you even start learning how to manage several computers working in tandem.
On top of all that, it can be expensive to run multiple full-sized computers. Energy costs quickly ramp up when you're running a cluster.
Setting up a Raspberry Pi ClusterHAT
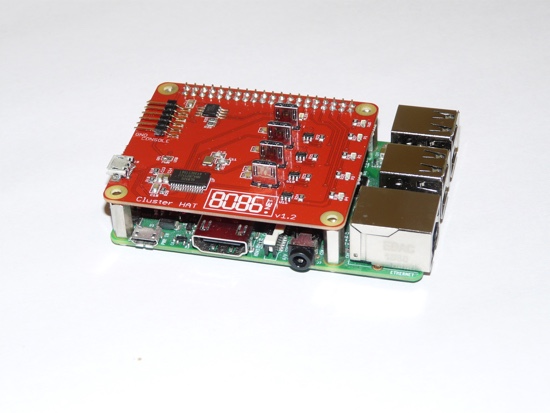
The Cluster HAT removes the expense and effort required to create a cluster. This lower barrier to entry makes it a lot easier to get on with the more important act of learning cluster computing technologies.
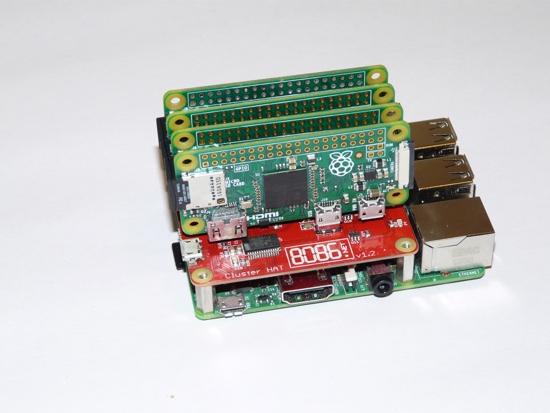
The HAT sits on top of a Raspberry Pi 2/3 and you slot four Pi Zero computers on to the HAT (via the USB connection).
Get a free Pi Zero W when you subscribe to The MagPi for 12 months
A USB cable is run from the Raspberry Pi to the HAT to provide power to the four Pi Zero boards. The latter are controlled directly via the GPIO pins.
You need a microSD card for each Pi Zero, and one for the controlling Raspberry Pi. So that’s five SD cards in total.
We costed up a Raspberry Pi, Cluster HAT, four Pi Zero boards, and four official microSD cards – it comes to £102. That’s by far the cheapest cluster computer you will find on the market. For those looking to get into cluster computing, this is a game-changer.
Getting started with ClusterHAT
Setting up the Cluster HAT hardware was an absolute breeze. Screw the four pins on to a Raspberry Pi 3 board and insert the supplied USB cable, then attach the HAT (wiring the cable between the board and HAT). Attach the USB power to the HAT and then slot on the four Pi Zero boards. The whole setup took less than five minutes.
Software is well handled too. A dedicated site provides image files for the controller (the Pi 2/3) and one image file for each Pi Zero board.
The Cluster HAT version of Raspbian boots into the command line, but offers a script for controlling the cluster. For example:
clusterhat on all
This command-line code switches on all four Pi Zero boards. You can also control them separately, using p1-4. Such as:
clusterhat p2 off

clusterhat p2 on
It takes a few moments for each Pi Zero to power up and load its software, at which point it’ll appear in ifconfig.
Access each node using SSH (enabled by default):
ssh pi@p1.local
Here you can use ifconfig to find the IP address Cluster HAT has assigned to the Pi Zero (under USB Ethernet).
Benchmark tests of ClusterHAT cluster computer
One thing this isn’t, though, is a supercomputer. There’s a good set of benchmarks by Nick Smith on Climbers.net.
Nick used iperf to test the network-over-USB connection and found it comparable to Ethernet.
The slower speed of the Pi Zero boards compared to Raspberry Pi 2/3 boards is much more pronounced.
Nick benchmarked the system using HPC Challenge Benchmark. He found the cluster of four Pi Zero boards ran at roughly half the speed of a single Raspberry Pi 3 board.
The slower speed makes sense when you think about it. Nick explains: “This is partly down to the faster individual cores in the Pi 3, but also the node-node communication is obviously a great deal faster within the Pi 3 SoC compared to communicating between separate Zeros with Ethernet-over-USB.”
So you’re not building a faster Raspberry Pi. However, we don’t think this matters. The aim for most people will be to build a low-cost and relatively easy‑to‑assemble cluster for educational purposes.
Once created, you can start to experiment with the concepts behind cluster computing. The Cluster HAT is ideal for teaching, learning or developing cluster computing ideas.
We suspect it will also appeal to developers who have access to larger cluster computing systems, but not all the time. You can test and run code on the Cluster HAT, then migrate it across to a larger system.
Getting started with distributed computing

Cluster computing is not a game for beginners. Realistically speaking, prospective learners will need a working knowledge of Python, Java, SQL (and relational database techniques). You’ll also need a good understanding of the Linux command line.
Fortunately, starters are not alone. There’s a vibrant ClusterHAT Google Groups board. There are lots of resources and projects being shared by the community.
One book that is recommended reading is Raspberry Pi Super Cluster (£16.78) by Andrew K Dennis.
Whatever resources you choose, we think the Cluster HAT is a great resource for starting distributed computing. It’s small, cheap, and easy to set up.
You have to leap a lot of hurdles to learn cluster computing. But Cluster HAT removes the expensive and difficult hardware build. It’s then up to you to learn the sophisticated coding techniques.
We tested this board using the original Pi Zero, not the newer Pi Zero W model. We believe the Pi Zero W will work exactly the same (as it has the same hardware). However, the hardware does not need (or use) the wireless networking on the Pi Zero W so it is better (and cheaper) to use the original Pi Zero board.
In the end, this is a compact, neat and cost-effective solution to building a cluster computer. The end-product might lack raw power, but it’s perfect for teaching and learning distributed computing concepts.


