
Raspberry Pi 4 is the perfect computer for controlling robots. In celebration of Adafruit’s upcoming CircuitPython Day (8 August 2019), we’re going to take a look at how easy it is to use CircuitPython on Raspberry Pi.
CircuitPython is designed to control low-cost microcontroller boards. For running robotics, Adafruit has many different breakout sensors and boards. We’re going to be looking at two boards that make a great combination in robotics: the BNO055 9-Degrees-of-Freedom (DOF) Absolute Orientation Breakout and the 16-Channel 12-bit PWM/Servo Driver.
This article first appeared in The MagPi 84 and was written by Melissa LeBlanc-Williams
The BNO055 is unique in that the sensor includes a built-in microprocessor that takes all of the data from the other sensors and calculates everything you want to know, for improved accuracy.
The 16-channel servo driver allows you to drive up to 16 different servos, which is excellent for robotics. Both of these boards can be driven through I2C, so they only take up two pins on Raspberry Pi. For this project, you will need both male-to-male and male-to-female jumper wires.
You'll need
- 16-Channel Servo Driver
- BNO055 9-DOF Breakout
- 2 × Servos
- 5 V power supply
- Female DC power adapter
- Breadboard
- Jumper wires
Solder the headers
If you haven’t already soldered the headers that came with the breakouts to the boards, let’s do it. One of the easiest ways is to cut the headers to length and insert them into some breadboard with the long pins facing down. Then place the breakout on the pins, apply heat, and solder.
Once you have all of the headers connected, take the servo driver, flip it over, and solder the terminal block to the top side. Optionally, you can also add a capacitor to the servo driver board, especially if you have a lot of servos.
Connect the servo driver
The first item that we’ll hook up is the 16-channel servo driver. Insert the breakout into the breadboard and wire it up to your Raspberry Pi according to the diagram, Figure 1 (below). Take the female DC power adapter, loosen the screws, insert a male-to-male jumper wire in each hole, and tighten down the screws. Connect the other ends of the jumper wire into the terminal block on the servo driver according to the diagram. Be sure to connect the 5 V wire to VCC and not V+.
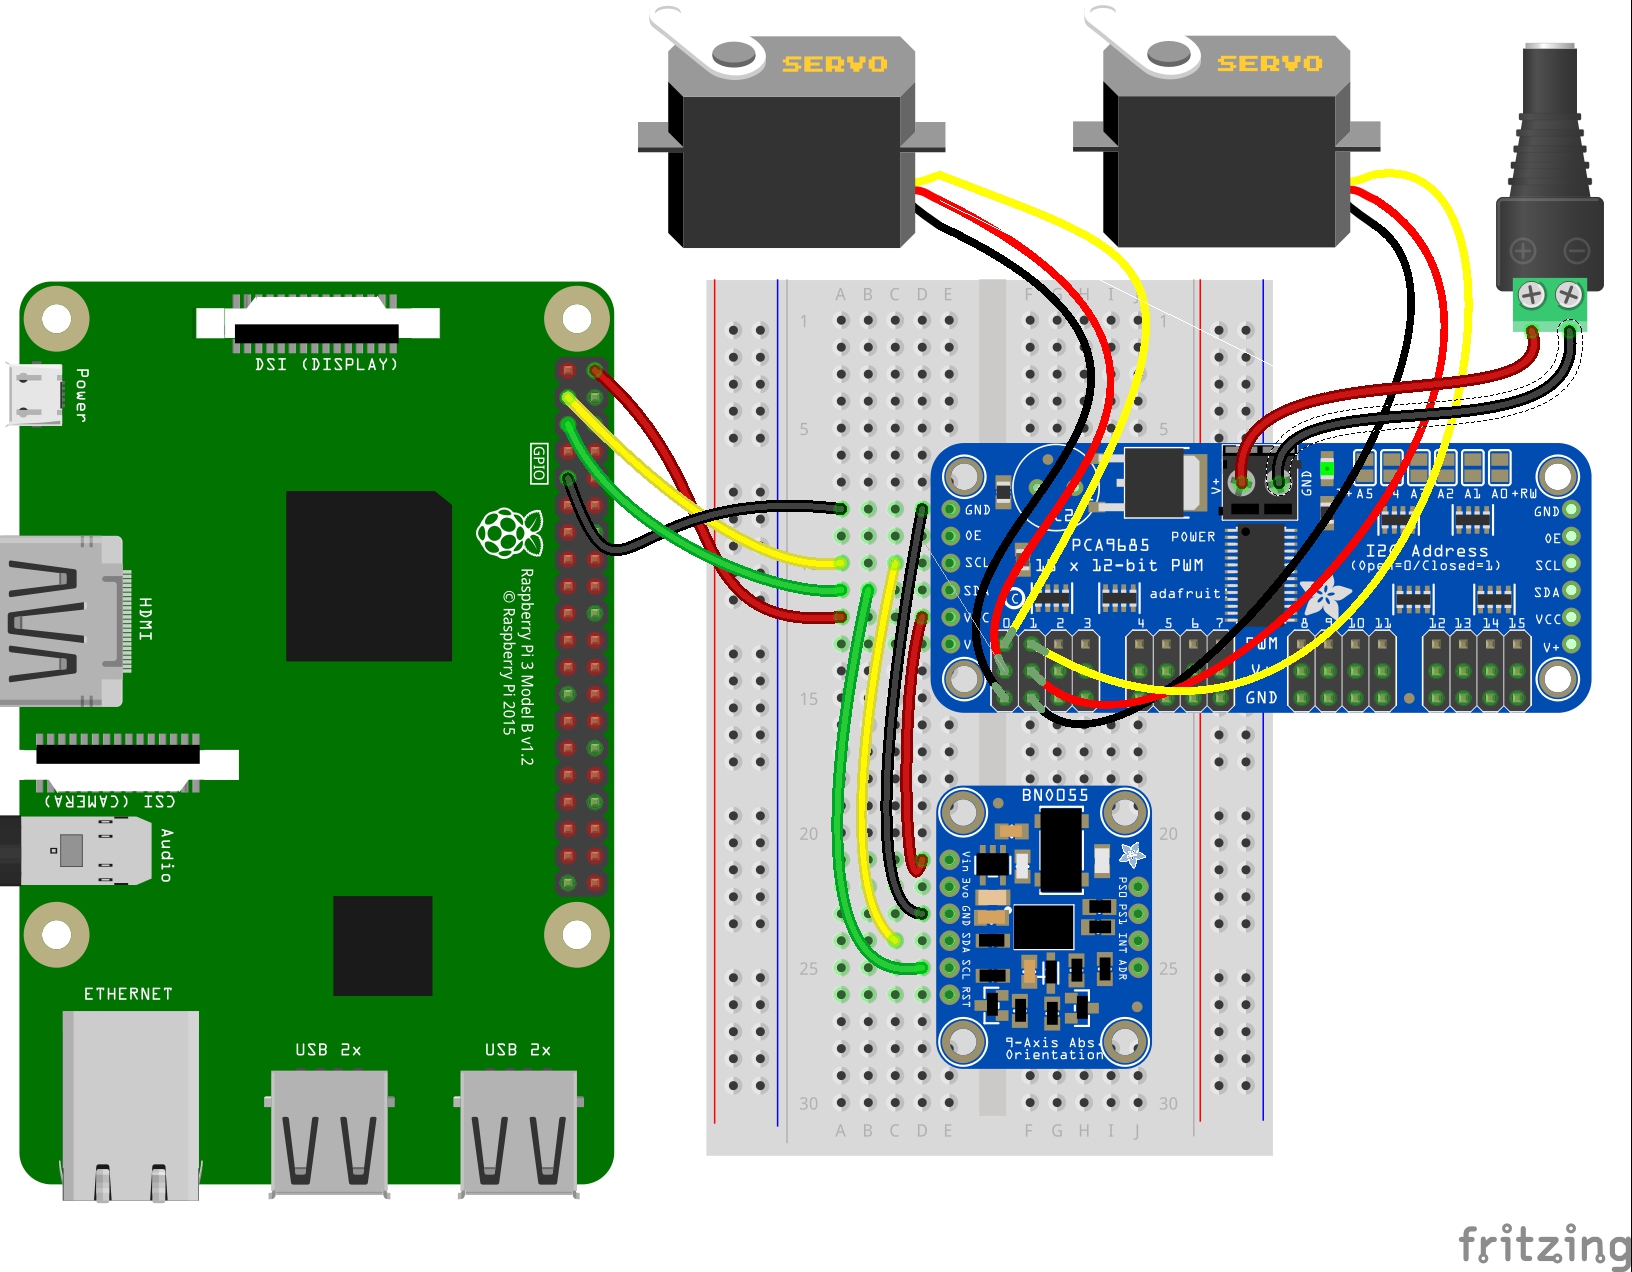
Connect the orientation sensor
The next item we’ll hook up is the BNO055 Absolute Orientation Sensor. Insert the breakout board into the breadboard. Connect the four wires according to the Figure 1 diagram. Since this is using I2C like the previous board, all four wires should be connected in parallel. Once that is connected, you can plug the two servos into the servo driver in positions 0 and 1, minding the orientation of the plug. Lastly, don’t forget to apply external power to the servo driver through the barrel connector we wired up in the last step.

Prepare your Raspberry Pi
Start by downloading and flashing the latest version of Raspbian Buster onto a microSD card. You should be able to use any of the available OS versions for this project, since we will be doing most of the steps from the command line.
Place the microSD card into your Raspberry Pi, power up, and follow the usual setup prompts. When requested, update and reboot if necessary. If you are running Buster Lite, be sure to run the following command:
sudo apt update && sudo apt upgrade
If you are running the desktop version, you will automatically be prompted to update. Updating is very important.
Laying the foundation
Next, we’re going to install some of the dependencies that we will need. If you are running the desktop versions, start by opening up a Terminal window (CTRL+ALT+T). Raspbian Buster should come with Python 3 and pip3, which are required; if not, you can run the following command to install them:
sudo apt-get install -y python3 git python3-pip
Next, install or upgrade setuptools by typing the following command:
sudo pip3 install --upgrade setuptools
The setuptools package in Python will help with installing Blinka when we get to it in a few steps.
Enabling the interfaces
Now we need to enable the I2C interface, which both of the boards use. We’re going to use the raspi-config tool for this. If not already at a command prompt, open up a Terminal window. Type the following command:
sudo raspi-config
Once raspi-config opens up, open up Interfacing Options, select ‘I2C’, and choose Yes to enable the I2C interface.
Next, go back into Interfacing Options again and do the same thing, except this time selecting ‘SPI’ to enable the SPI interface so that you’ll have it available.
Enable clock-stretching
Certain I2C sensors such as the BNO055 need to have clock-stretching enabled. This slows down the I2C clock so the sensor can keep up with the speedy Raspberry Pi and not drop any data. We’ll want to slow it down from 100kHz to 10kHz. We do that by adding a line to the configuration file. To enable clock-stretching, you’ll want to open up /boot/config.txt in your favourite editor (e.g. nano). At the end of the file, add the following line:
dtparam=i2c_arm_baudrate=10000
After that, save the file and reboot your Raspberry Pi. Clock-stretching is now enabled.
Install Blinka
Next, we want to install any remaining Python libraries that Blinka requires. For the first one, we’ll use RPI.GPIO, which should already be installed. You can verify this by going to a command prompt and typing:
pip3 install RPI.GPIO
Finally, we’ll actually install Blinka. As well as Blinka itself, this will install a few dependencies such as PureIO and PlatformDetect. Type the following command to install Blinka and any
other dependencies:
pip3 install adafruit-blinka
Install driver libraries
Next, we need to install the required libraries to use Blinka with the BNO055 and servo driver. Make sure you have a Terminal window open and type the following commands:
pip3 install adafruit-circuitpython-pca9685
pip3 install adafruit-circuitpython-servokit
pip3 install adafruit-circuitpython-bno055
This will install the drivers for both boards, as well as the ServoKit helper library that makes using servos very easy.
Running the code
Now we want to save the demo code in your home directory (/home/pi) on Raspberry Pi. You can either open up your favourite editor on Raspberry Pi and enter it directly, or copy the file with an SCP or FTP utility if you have those services enabled. Once you have the code in your home directory, you can run it from the command line by typing the following:
python3 demo.py
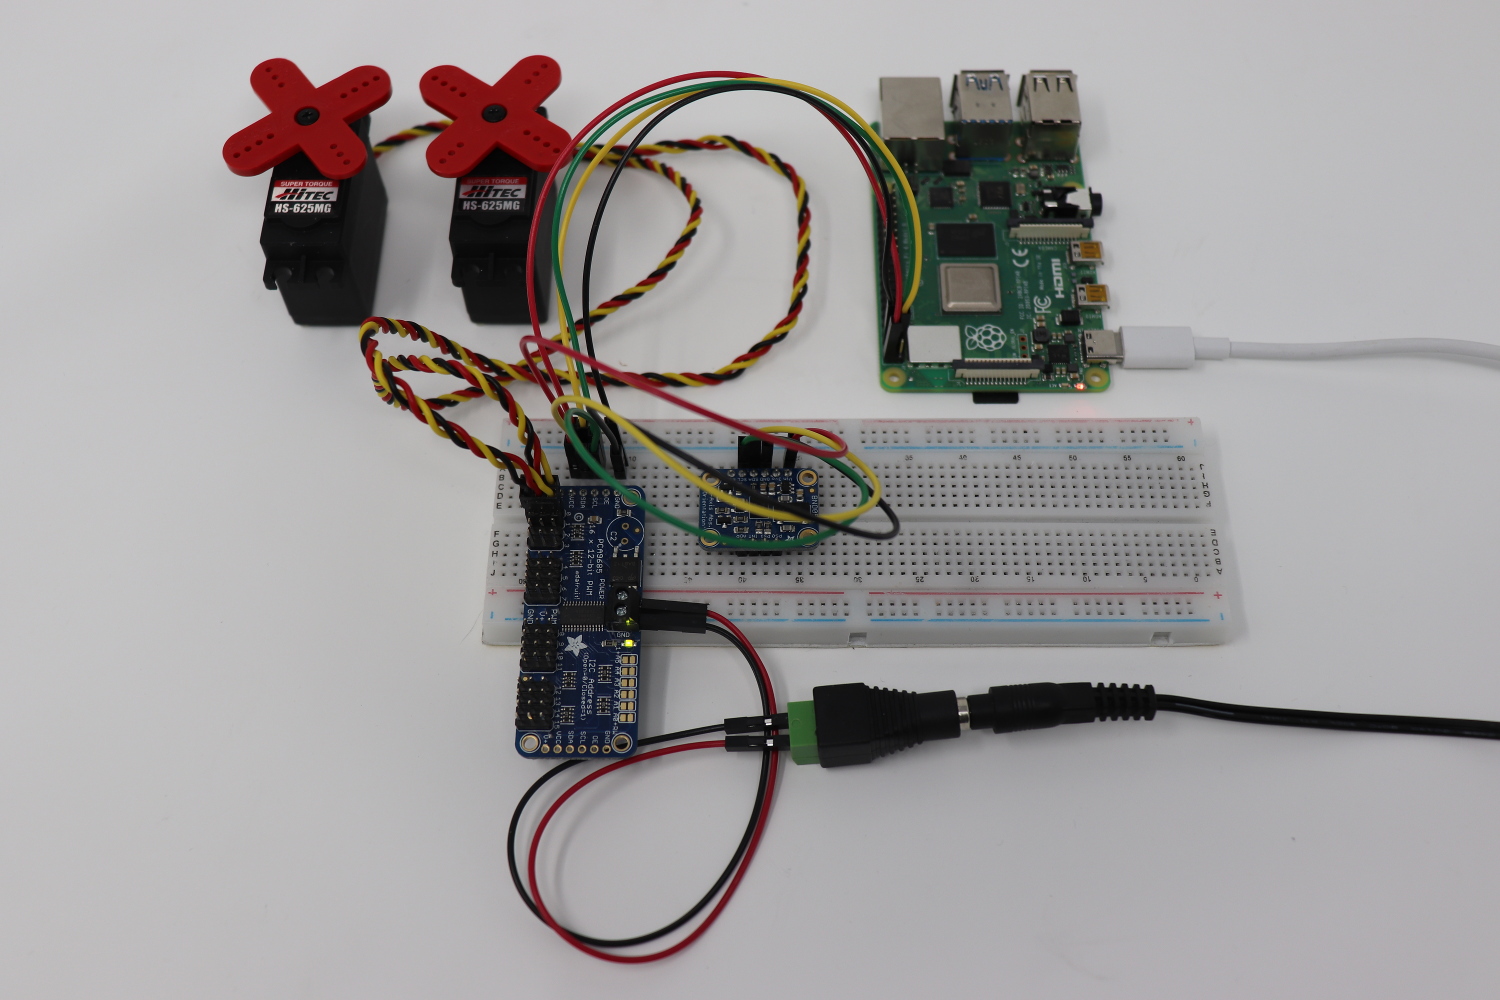
Once you have the code running, pick up your breadboard and start moving it around. As you tilt it in various directions, the servos should respond depending on the axis that you tilt around. You could always add a third servo and respond to the third axis and slightly modify the code.
Other options
Adafruit offers plenty of other options for using Raspberry Pi for robotics, including the CRICKIT HAT. This plugs right into the GPIO header on Raspberry Pi and allows up to four servos, but is also able to control stepper motors and DC motors, drive NeoPixels, play sound through a speaker, and has capacitive touch. It has eight digital/analogue inputs that can also be configured as digital outputs. All the features on this board are wrapped up in one nice CircuitPython library.
More learning resources
Adafruit offers many more learning guide resources to show you what the Raspberry Pi is capable of and so much more. At the time of writing, there are close to 2000 guides available. You can go to the Adafruit website and browse through all of the guides available.
CircuitPython is being added to more boards all of the time, with guides being written for them. You can always go to the Circuit Python Blinka page to see which other boards are supported.


