How do I install NOOBS on a Raspberry Pi is a common question for beginner's to ask. NOOBS (New Out Of Box Software) is a piece of software designed to make installing an OS (operating system) on a Raspberry Pi as quick and simple as possible.
With NOOBS you can install Raspbian (the default OS for Raspberry Pi) along with other operating systems that turn the Raspberry Pi into a retro gaming console, media player, and much more.
Click here for a free digital Raspberry Pi QuickStart guide made by The MagPi team.
Get a free Raspberry Pi with a subscription to The MagPi. Click here for more information.
In this tutorial:
- How to format an microSD Card
- Download and copy the NOOBS software to the microSD Card
- Power up a Raspberry Pi and use NOOBS to install Raspbian OS
- Setting up Raspbian OS
See also:
- Easy retro gaming on a Raspberry Pi with Lakka and NOOBS
- Beginner's Guide to NOOBS
- Install NOOBS on a Raspberry Pi
Now you’ve got all the pieces together, it’s time to install an operating system on your Raspberry Pi, so you can start using it.
Raspbian is the official OS for the Raspberry Pi, and the easiest way to set up Raspbian on your Raspberry Pi is to use NOOBS (New Out Of Box Software).
If you bought a NOOBS pre-installed 16GB microSD card, you can skip to "Assemble your Raspberry Pi". Otherwise you’ll need to format a microSD card and copy the NOOBS software to it.
Prepare to format
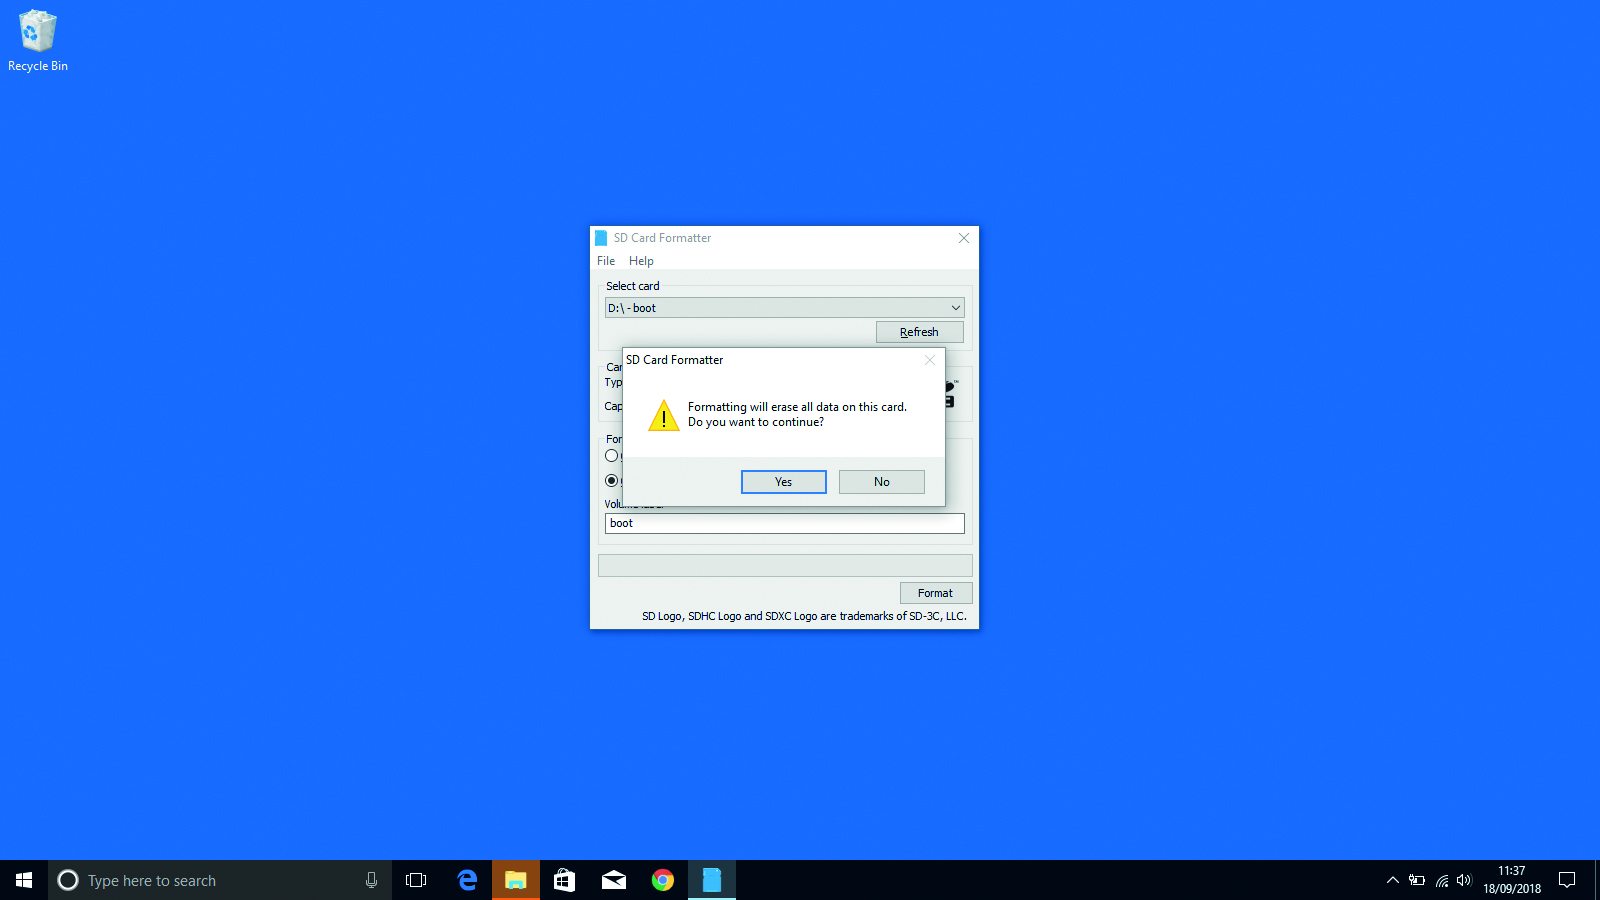
Start by downloading SD Card Formatter tool from the SD Card Association website. Now attach the microSD card to your PC or Mac computer and launch SD Card Formatter (click Yes to allow Windows to run it). If the card isn’t automatically recognised, remove and reattach it and click Refresh. The card should be selected automatically (or choose the right one from the list).
Format the microSD
Choose the Quick Format option and then click Format (if using a Mac, you’ll need to enter your admin password at this point). When the card has completed the formatting process, it’s ready for use in your Raspberry Pi. Leave the microSD card in your computer for now and simply note the location of your duly formatted card. Windows will often assign it a hard drive letter, such as D; on a Mac it will appear in the Devices part of a Finder window.
Download NOOBS from Raspberry Pi
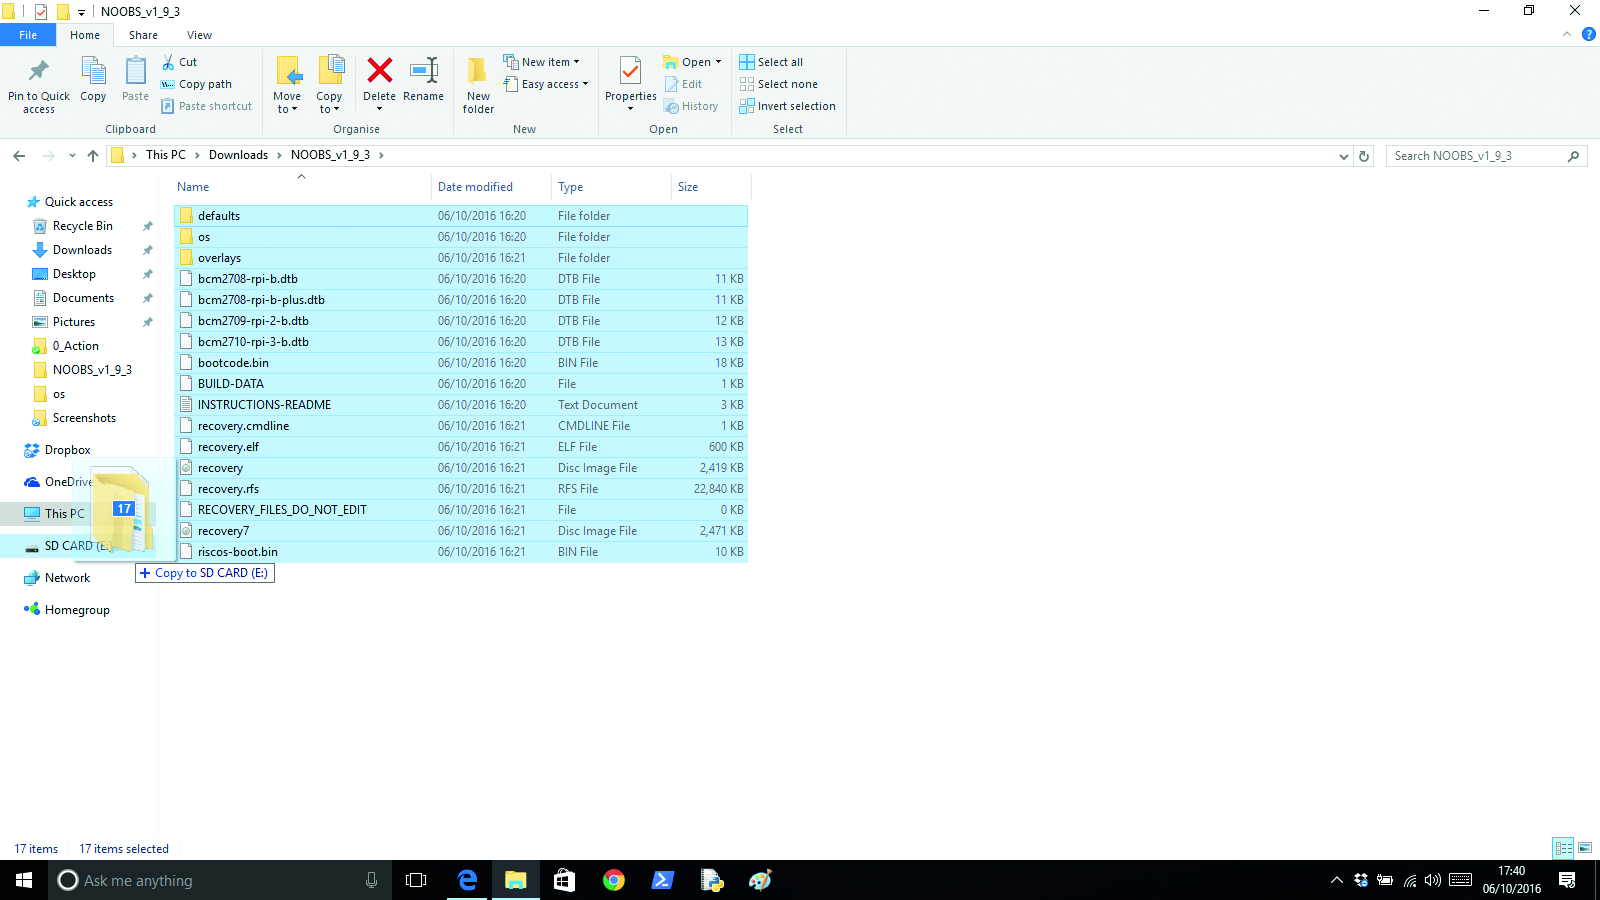
Download the NOOBS software from the Raspberry Pi website. NOOBS (New Out Of Box System) provides a choice of Raspberry Pi operating systems and installs them for you. Click ‘Download zip’ and save the file to your Downloads folder. When the zip file download is complete, double-click to launch and uncompress the folder. You’ll need to copy all the files from the NOOBS folder to your microSD card. Press CTRL+A (⌘+A on a Mac) to select all the files, then drag all the files to the SD card folder. Once they’ve copied across, eject your SD card. Be careful to copy the files inside the NOOBS folder to the microSD card (not the NOOBS folder itself).
Assemble your Raspberry Pi
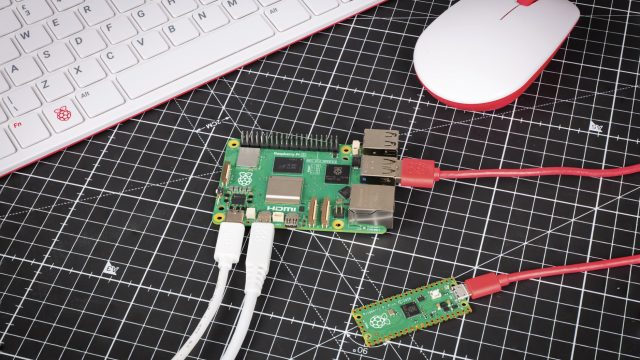
Now it’s time to physically set up your Raspberry Pi. Plug your PC monitor into the mains and attach its HDMI cable to the corresponding HDMI port on your Raspberry Pi. Attach the micro USB end to the Raspberry Pi. Use the remaining USB ports to attach keyboard and mouse. Finally, remove the microSD card from the SD card adapter and slot it into the underside of your Raspberry Pi 3B+ or 3. Pi Zero W owners will need to attach a USB hub to connect mouse, keyboard, and monitor. The Zero W’s microSD card slot is on the top of its circuit board.
Power up the Raspberry Pi
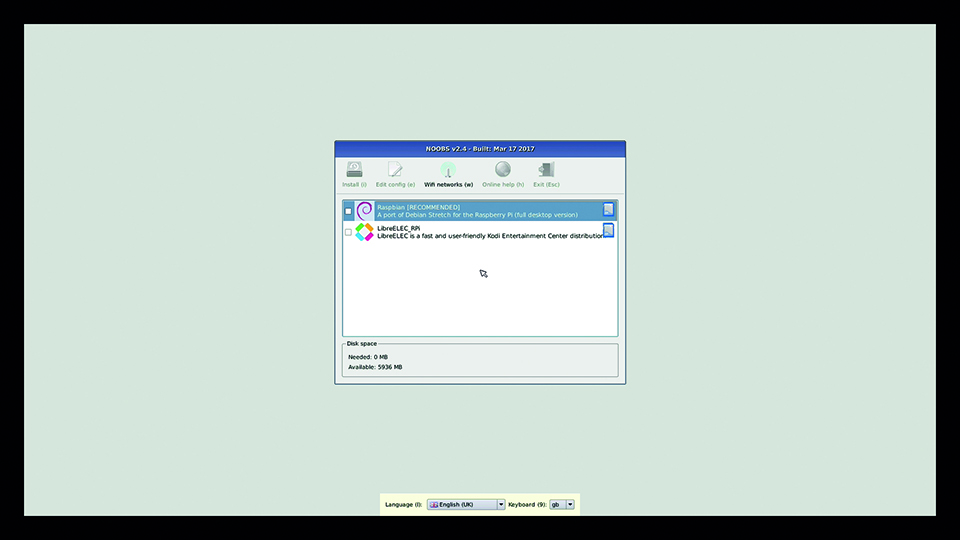
Plug in your Raspberry Pi power supply and, after a few seconds, the screen should come on. When the NOOBS installer appears, you’ll see a choice of operating systems. We’re going to install Raspbian Full [RECOMMENDED], the first and most feature-packed OS. Tick this option and click Install, then click Yes to confirm. For more OS options, instead click ‘Wifi networks’ and enter your wireless password; more OS choices will appear. Installation takes its time but will complete – eventually. After this, a message confirming the success installation appears. Your Raspberry Pi will prompt you to click OK, after which it will reboot and load the Raspbian OS.
Start Raspbian OS and get online
When Raspbian loads for the first time, you need to set a few preferences. Click Next, when prompted, then select your time zone and preferred language and create a login password. You’re now ready to get online. Choose your WiFi network and type any required password. Once connected, click Next to allow Raspbian to check for any OS updates. When it’s done so, it may ask to reboot so the updates can be applied.
Click the Raspberry Pi icon at the top left of the screen to access familiar items such as the LibreOffice suite, internet, games, and accessories such as the image viewer, text editor, and calculator. You’re all set to start enjoying your very own Raspberry Pi.


