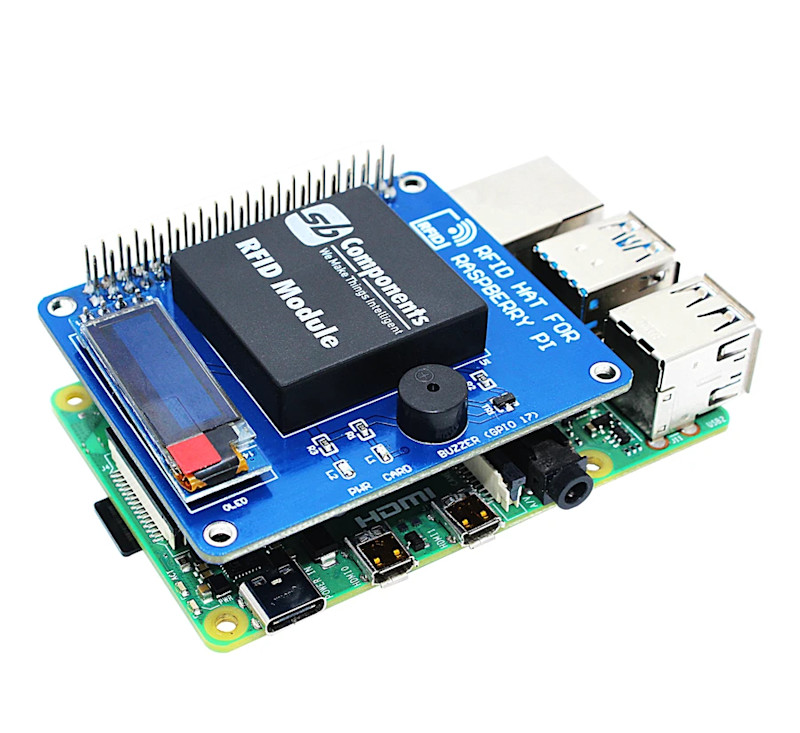
The RFID HAT (£25 / $34) from SB Components comes with an RFID Module reader and two RFID tags (a plastic card and a key fob). On the HAT is also a small 0.91-inch OLED display, buzzer, and LEDs for power and card detection. There is also a GPIO extension header, enabling you to hook up the RFID HAT components to further items.
The HAT (Hardware Attached on Top) runs a UART (Universal Asynchronous Receiver/Transmitter) in the 125KHz frequency range. You can pick up extra RFID tags, cards, and stickers for very little cost. Each RFID tag contains a unique identification number, which is detected when the tag is placed next to the RFID reader on the HAT.
RFID projects
We’ve seen many Raspberry Pi projects make great use of RFID technology. Perhaps the most famous is Museum in a Box. This project enables people to pick up objects and tap them to a Raspberry Pi-controlled speaker and hear an audio response. We’ve also seen a few projects that play Spotify albums when a model of the physical media is brought next to the RFID reader. In addition, you can use RFID for more standard projects such as ID badging, access control, and tracking of items.

Thanks to HAT technology, the installation is taking care of with the built-in EEPROM. You need to activate I2C and Serial Interface in Raspberry Pi OS, but it took all of five minutes to get everything up and running. There are some instructions in the store page, but we found it clearer to follow the instructions on the GitHub page.
"We’ve seen many Raspberry Pi projects make great use of RFID technology."
Once set up there are three sample scripts: one which displays the RFID ID on the command line, one which displays it on the OLED screen and rings the buzzer, and a third that displays the LED on the board when an RFID tag is detected.
We couldn’t find API documentation, but reading the sample scripts was easy enough. Still, we would prefer to see more detail in the documentation. We had fun playing around with the RFID HAT and think it’d be a great way to implement RFID technology into your Raspberry Pi project.
Verdict
8/10
A fantastic HAT with good-quality components, and the OLED display is a nice touch. The documentation could be better, but we found everything easy to set up and understand.