Is your door a bore? Open and close, open and close. Snoozefest. Surely it can do more than that? How about a smart door that knows when someone approaches, when the post arrives, and can even offer remote viewing of the peephole? You can also add intelligent lighting, a controllable door lock, and facial recognition, all powered with your Raspberry Pi. So, let’s ignore super-expensive door systems and build our own. You can do as much, or as little, as you like of this project and there’s plenty of room for new and inventive uses.
This article first appeared in The MagPi 77 and was written by PJ Evans
You'll need
- Raspberry Pi Touch Display
- Camera Module
- PIR sensor
- 2 × Security door contact reed switch
- Wired doorbell
- PAM8302 amplifier
- Speaker
- Magnetic access control system
Prepare your Raspberry Pi
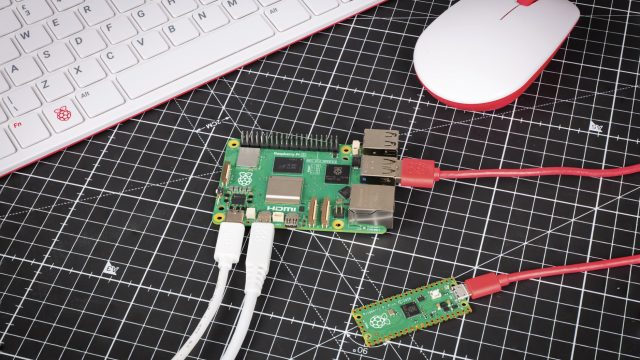
Although you can use any WiFi-capable Pi, this is a perfect project for the new Raspberry Pi 3A+. Start by attaching the Pi to the Touch Display and preparing a microSD card with the latest Raspbian Stretch release. To allow easier access and mounting, we’ve detached the control board from the back of the screen, taking great care of the ribbon cable. Eventually, they’ll be put in a smart 3D-printed case. Now, get your Pi set up and make sure to sudo apt update && sudo apt upgrade before proceeding.
Attach the camera
We’re going to keep an eye on the outside world by replacing the door’s peephole with the Raspberry Pi camera. A peep-hole is typically a two-piece barrel that screws together and can be easily unscrewed from the inside. Remove the barrel and cover the hole with the camera. We’re just going to affix this with tape for now; a printed mount will come later. Mount the screen and Pi to the door (we used 3M Command strips), placed so you can attach the camera’s ribbon cable to the Pi once it’s shut down. Make sure the camera is enabled in Raspberry Pi Configuration or raspi-config.
Footsteps approaching!
The first smart thing our door is going to do is detect someone approaching it. A cheap PIR sensor is perfect for the job. These cool little geodesic domes are triggered by heat and are the same gizmos that you find in motion-sensor lights, switches, and security systems. Connect to the Pi as shown below, checking whether you have a 5 V or 3.3 V sensor. Sensitivity and duration of a ‘detection’ can be controlled by the two potentiometers on the PIR board. Mount this outside in a suitable location to ‘watch’ your door.

Monitor the door and letterbox
We have two magnetic reed switches, the type you find on windows and doors for security systems. They are made up of two parts: the wired part is a reed switch and the unwired a magnet. When the magnet meets the switch, it closes. If we attach the magnet to the door and the switch to the frame, when the door opens, so does the switch. There’s no polarity to worry about, so connect one wire to GPIO 26 and the other to the adjacent ground. Repeat for the letterbox using GPIO 19. You may need a breadboard.
Ding dong!
Regular doorbells? Yawn. If we replace the doorbell with our own button, we can take a photo with the Pi Camera Module when someone presses it and send a notification. Way better. Mount a standard wired doorbell, which after all is just a momentary contact button, to the outside door frame and wire it back to the Pi using GPIO 13 and an available GND pin. If you’re prototyping on a breadboard, a tactile switch will do fine.
Sounds good
There’s little point in a doorbell that makes no sound. We can use the small, but surprisingly powerful, PAM8302 amplifier with a speaker to make some noise. Supply power by soldering ‘Vin’ to an available 3V3 pin on the Pi, and ground to GND. To get an audio signal, you can tap the audio connector’s signal and ground, then connect them to A+ and A- respectively. Finally, solder the speaker to the larger + and - terminals. When prototyping, you can skip this and use any active or passive speaker via the audio connector on the Pi.
Code
Double-check all your connections and power on the Pi. To use the code created for this project, open a Terminal and enter:
mkdir ~/smartdoor
nano ~/smartdoor/smartdoor_test.py
Now type in the code as shown. Alternatively, to download all the code:
cd
git clone https://github.com/mrpjevans/smartdoor
To enable it to play our doorbell sample:
sudo apt install mpg123
Now test with:
python3 ~/smartdoor/smartdoor_test.py
Watch the console output. If everything is working, you should be able to trigger the PIR, the reed switches, and the doorbell. The camera will capture ten seconds of video when motion is detected, and a photo when the doorbell is pressed. These are both saved to the desktop.

Get alerts!
Let’s make this useful. Install Pushover on your phone, head over to pushover.net, sign up for a trial account, then log in and make a note of your User Key (a long string of characters). Now create a new Application and give it a name. Once created, you’ll see an API Token. Make a note of this too. From the GitHub repository, edit smartdoor.py and add the User Key and API Token where shown. Run this version and you’ll get phone alerts for each event and even a photo attachment when the doorbell is pressed.
Intelligent porch light
Following on from the Trådfri lighting tutorial in The MagPi #75, if you have an external porch light, why not make it smart! The file porch.py will connect a Trådfri smart light to an API that provides sunrise and sunset times for your location. Leave the script running and the light will switch on and off at the correct times. Additionally, it monitors the PIR sensor and will switch to full brightness when someone approaches! To use the script, get your latitude and longitude (you can use Google Maps or Earth) and edit porch.py as directed in the file.
Door lock
If you’re interested in being able to control your door’s lock, you may see that some solutions are very pricey. One that is perfect for experimentation is the magnetic hold lock, which uses an electromagnet to hold the door closed. The one we’ve used can withstand 180 kg of force, although stronger ones are available. The magnet mounts on the door and the electromagnet on the frame. The provided PSU contains a relay that can be powered by the Pi by simply connecting it to a spare GPIO line and ground. Please note this is no replacement for a proper door lock system.
Web app
If would be great to see what our door has been up to remotely, so a web app seems the next logical step. In the directory called webapp is a Python script that uses Flask to provide a web server that is usable on mobile devices. You can take a photo from the peephole, see the last recorded video, and even control the magnetic door lock from Step 10. Simply run the app alongside the others. Better still, set smartlights.py, porch.py, and webapp/smartdoor.py to start on boot (see the repository README).
Facial recognition
Once a futuristic technology, decent facial recognition is now well within the grasp of the Raspberry Pi. Using the doorbell photo taken by the Pi, we can recognise a face using reference photos and send an alert to Pushover with the name of the caller! In a secure environment, a recognised face could even trigger the lock or you could play a welcome announcement. The install process is a little complicated, so if this interests you, see the documentation in the GitHub repository in the face_recognition directory of the ‘smartdoor’ repository.
Over to you
Here we’ve given you the basics to get going, but more complex events are possible. You could alert different people based on facial recognition or play custom doorbell tones. And, if you had problems with deliveries, video evidence can build up automatically. On a serious note, remember a lot of this is ‘just for fun’ and designed to inspire, so unless you’re prepared to put in the work hardening the code and including failsafes, don’t rely on this, or possibly make it as a fun kids’ door project (but maybe without the lock!).


