New 360 videos are all the rage thanks to YouTube. They’re even more amazing when combined with virtual reality (VR) headsets.
Also known as “omnidirectional cameras,” these new 360-degree cameras record a complete panorama of video (instead of just what the camera is being pointed at). The viewer then pans around the set, and can look from whatever angle they want. It’s just like being on the set.
Buying 360-degree awesomeness isn’t cheap though. And most professional 360-cameras cost over £300.
360-camera project built with a Raspberry Pi
Tinkernut Labs has a much cheaper 360-camera solution involving a Raspberry Pi, a webcam and a Kogeto Panoramic Camera Accessory for iPhone (picked up on Amazon for around $15).
The panoramic lens was stripped down, and hooked up to a Raspberry Pi webcam. The Raspberry Pi records the video as a sphere, which is then de-warped to provide a panorama. You lose a lot of resolution in the process, but the result is a full 360-camera project.
“The reason I'm using a Raspberry Pi,” says Tinkernut, “is because it's small, runs Linux and can process and convert the video that captures without the need for an external computer.”
The Raspberry Pi 360 Camera requires special software called “Computer Vision” says Tinkernut on his website. There’s an excellent simple computer vision platform called “SimpleCV“, based on the more in-depth OpenCV software. Tinkernut Labs also produces an guide to installing SimpleCV as part of another project.
“My main goal is to upload it to the YouTube viewer,” says Tinkernut. “You need to download this YouTube metadata injection kit and run your video through it so YouTube knows that it's a 360 degree video.” You can try out videos in your browser by clicking and dragging them around. You can play them using YouTube on a smart phone (and move around to change the view). Or you can view them with a VR headset.
How-to make the Raspberry Pi 360 Camera
The Kogeto Dot camera attachment is designed for an iPhone, not the Raspberry Pi. So Tinkernut used a dremel to remove all the plastic around the lens. “I did this using both really sharp shears and a dremel,” he says. “Then I smoothed out everything using some sandpaper. It’s probably a good idea to put a little piece of tape over the lens hole so that you don’t get any plastic pieces on the mirror.”
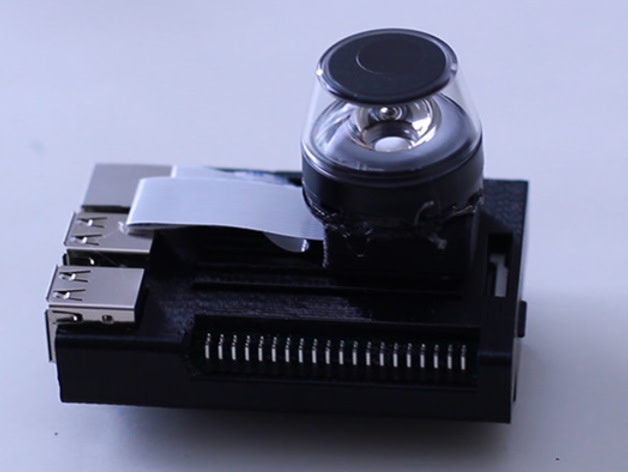
The device is mounted on top the Raspberry Pi my means of specially designed 3D printing case. This supports the panoramic lens on top. Tinkernut experimented with a cardboard case, although you can just download his 3D Printed files for the Raspberry Pi 360 Video Case Camera from Thingiverse.

“Once everything was printed, I just added a couple dabs of hot glue to secure the camera and the lens,” he says.
The end result is this neat looking Raspberry Pi 360 Video Camera that can record omnidirectional video and uploads it directly to YouTube.


